
This canning guide provides a reliable method for preserving fresh peaches in a thick, spiced syrup. Having these jars in your pantry allows for quick dessert preparation any time of the year.

List of ingredients
- 6 quarts peeled and sliced peaches – use freestone varieties for easier pitting.
- 4 1/2 cups sugar – provides sweetness and acts as a preservative.
- 1 cup clear jel – a specialized canning thickener that stays stable during processing.
- 2 tbsp salt – balances the sweetness of the fruit.
- 1 tbsp cinnamon – adds a warm, classic pie flavor.
- 1 tsp nutmeg – provides a subtle, nutty aromatic quality.
- 1 tsp allspice – adds complexity to the spice blend.
- 9 1/2 cups water – used for the syrup and the thickener slurry.
step-by-step instructions
- Peel and slice peaches: Bring a large pot of water to a boil and prepare an ice water bath. Submerge peaches in boiling water for 30-45 seconds, then transfer them to ice water so the skins slip off easily. Cut the peaches in half, remove the pits, and slice into uniform wedges. Toss the slices with a splash of lemon juice to prevent oxidation.
- Cook the filling: Combine the sliced peaches and sugar in a large stainless steel pot. Bring the mixture to a gentle boil over medium heat, stirring occasionally. This process softens the fruit and creates a concentrated natural syrup.
- Thicken and spice: Mix the clear jel with a portion of the cold water to create a smooth slurry. Slowly pour the slurry into the simmering peaches while stirring constantly to avoid lumps. Stir in the salt, cinnamon, nutmeg, and allspice, cooking for a few more minutes until the desired thickness is reached.
- Prepare jars: Inspect jars for chips or cracks and wash them in hot, soapy water. Sterilize the jars in boiling water for 10 minutes. Keep the lids in a simmering pot of water to soften the sealing compound until they are ready for use.
- Fill and process: Ladle the hot filling into sterilized jars, leaving 1 inch of headspace. Remove air bubbles with a plastic tool and wipe the rims clean. Secure the lids with bands until fingertip tight and process in a water bath canner for 25 to 30 minutes. Cool the jars undisturbed for 24 hours and verify the vacuum seal.
Selecting the Right Produce
Choosing Freestone Peaches
Freestone peaches are the best choice for canning because the pit separates easily from the flesh. This prevents the fruit from bruising or tearing during the pitting process. They maintain a firmer structure during the cooking and canning process.
Identifying Peak Ripeness
Select peaches that are fragrant and yield slightly when pressed gently. Avoid fruit with deep bruises or soft spots that indicate over-ripeness. Perfectly ripe peaches provide the best balance of natural sugars and acidity for preservation.
Cleaning the Fruit
Wash peaches in cool water with a small amount of white vinegar to remove surface residue. Gently scrub the fruit, especially around the stem area. Rinse thoroughly under running water before starting the blanching process.
Essential Canning Equipment
Using a Water Bath Canner
A water bath canner is suitable for this recipe because the high acidity of the peaches and sugar prevents spoilage. Ensure the pot is deep enough that the jars are covered by at least two inches of water. Maintain a rolling boil throughout the entire processing time.
The Role of a Jar Lifter
A jar lifter is essential for safely removing hot jars from the boiling water. It provides a secure grip and prevents the risk of burns or dropping the glass. This tool ensures the jars are moved steadily to the cooling area.
Maintaining Sterile Environments
Keeping jars and lids hot until the moment of filling prevents thermal shock. Thermal shock can cause the glass to crack when the hot filling is added. Using a clean, damp cloth to wipe the rims ensures that no food particles interfere with the seal.
Thickening Agents and Substitutions
The Benefits of Clear Jel
Clear Jel is a modified cornstarch specifically designed for home canning. Unlike regular cornstarch, it does not break down or become cloudy when processed in a water bath. This ensures the filling remains thick and visually appealing after months of storage.
Using Pectin as an Alternative
Pectin can be used as a substitute if Clear Jel is unavailable. However, pectin requires a different application method and may result in a more gel-like consistency. Always follow the specific manufacturer instructions when using pectin for pie fillings.
Avoiding Standard Flour or Cornstarch
Standard flour and cornstarch are not recommended for canning because they can degrade during the heating process. This can lead to a watery filling and may create safety concerns regarding the stability of the preserve. Stick to approved canning thickeners for long-term shelf stability.
Processing and Safety Guidelines
Adjusting for Altitude
Processing times must be increased for homes located above 1,000 feet. At higher altitudes, water boils at a lower temperature, which may not be sufficient to kill microorganisms. Consult a standard canning altitude chart to add the necessary minutes to your processing time.
Verifying the Vacuum Seal
After the jars have cooled for 24 hours, press the center of the lid. A successful seal is indicated by a lid that does not move or pop back. If the lid flexes, the seal has failed and the jar must be stored in the refrigerator.
Handling Headspace Correctly
Leaving exactly one inch of headspace is critical for a proper vacuum seal. Too much space can prevent the lid from sealing, while too little can cause the filling to bubble over during processing. Use a headspace tool for precision.
Creative Ways to Use Canned Filling
Creating a Quick Peach Cobbler
Pour the canned filling into a baking dish and top it with a simple biscuit dough. Bake until the topping is golden brown and the filling is bubbling. This is an efficient way to serve a warm dessert with minimal prep time.
Assembling Dessert Parfaits
Layer the chilled peach filling with Greek yogurt and granola in a glass. This creates a balanced breakfast or a light dessert. The thickness of the canned filling prevents the layers from mixing too quickly.
Topping Breakfast Favorites
Warm the filling slightly in a saucepan to use as a topping for pancakes or waffles. It serves as a fruity alternative to maple syrup. You can also stir it into morning oatmeal for added flavor and sweetness.
Storage and Long-Term Maintenance
Optimal Storage Conditions
Store your canned peach filling in a cool, dark place such as a pantry or cellar. Keep the temperature between 50°F and 70°F to maintain the quality of the fruit. Direct sunlight and temperature swings can cause the color to fade and the texture to change.
Labeling and Rotation
Label every jar with the contents and the exact date of canning. Use a first-in, first-out rotation system to ensure you use the oldest jars first. Properly processed filling is best used within one year for peak flavor.
Inspecting for Spoilage
Check jars periodically for bulging lids or leaks. If you open a jar and notice an off-odor or visible mold, discard the contents immediately. Never taste food from a jar that shows signs of spoilage.
Troubleshooting Common Issues
Addressing Thin Consistency
If the filling is too thin after processing, it may be due to under-cooking the slurry. Ensure the filling reaches a full boil after adding the thickener to activate the starch. For future batches, slightly increase the amount of Clear Jel.
Preventing Peach Browning
Browning occurs when peaches are exposed to air for too long. To prevent this, toss the sliced fruit in lemon juice immediately after peeling. Working in small batches also helps minimize oxidation.
Fixing Leaking Lids
Leaking usually happens if the jar rim was not wiped clean before sealing. Even a tiny drop of syrup can prevent a perfect vacuum. Always use a damp cloth to ensure the rim is spotless before applying the lid.
Frequently Asked Questions
What kind of peaches are best for making pie filling?
Freestone peaches are highly recommended because the pit separates easily from the flesh, reducing fruit damage. They also tend to hold their shape better during the boiling and canning process.
How do I prepare peaches for canning?
The best method is to blanch the peaches in boiling water for 30-45 seconds and then shock them in ice water to remove the skins. After peeling, slice them into uniform pieces and toss them with lemon juice to prevent browning.
How long should I process peach pie filling in a water bath canner?
Process the jars for 25 to 30 minutes at sea level, ensuring they are covered by two inches of water. Always adjust this time based on your specific altitude to ensure safety.
Can I adjust the sugar or spices in the peach pie filling recipe?
You can make minor adjustments to the spices to suit your taste. However, avoid significantly reducing the sugar, as it is essential for the preservation process and the overall texture of the filling.
Print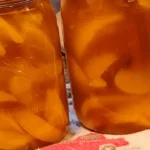
Preserving Homemade Peach Pie Filling
- Total Time: 75 minutes
- Yield: 6 quarts 1x
- Diet: Vegetarian
Description
This peach pie filling is a sweet and juicy blend of ripe peaches, sugar, and warm spices, creating the perfect base for a delicious homemade pie. It’s thickened to the ideal consistency, making it easy to use for pies, tarts, or as a topping for desserts. Whether you’re baking now or preserving it for later, this recipe captures the essence of summer in every bite!
Ingredients
- 6 quarts peeled and sliced peaches
- 4 1/2 cups sugar
- 1 cup clear jel
- 2 tbsp salt
- 1 tbsp cinnamon
- 1 tsp nutmeg
- 1 tsp allspice
- 9 1/2 cups water
Instructions
- Peeling and Slicing Peaches: Blanch peaches in boiling water for 30-45 seconds, transfer to an ice bath, peel, slice into wedges, and toss with lemon juice to prevent browning.
- Cooking the Peach Pie Filling: Combine sliced peaches and sugar in a large non-reactive pot and bring to a gentle boil over medium heat, stirring occasionally.
- Adding Thickeners and Flavorings: Mix clear jel with cold water to create a slurry, slowly pour it into the simmering peaches while stirring constantly, and cook until the desired thickness is reached.
- Preparing Jars and Lids: Wash and sterilize jars in boiling water for 10 minutes and simmer lids in hot water to soften the seals.
- Filling and Processing the Jars: Ladle hot filling into hot jars leaving 1 inch headspace, remove air bubbles, wipe rims, seal with lids, and process in a water bath canner for approximately 25-30 minutes depending on altitude.
Notes
Use freestone peaches for easier pitting. Store canned jars in a cool, dark place between 50°F and 70°F for up to 18 months.
- Prep Time: 20 minutes
- Cook Time: 30 minutes
- Category: Pantry
- Method: Canning
- Cuisine: American
Nutrition
- Serving Size: 1 quart
- Calories: 620 kcal
- Sugar: 165 g
- Sodium: 980 mg
- Fat: 1 g
- Saturated Fat: 0 g
- Unsaturated Fat: 1 g
- Trans Fat: 0 g
- Carbohydrates: 175 g
- Fiber: 8 g
- Protein: 4 g
- Cholesterol: 0 mg