
Deviled eggs are the quintessential party appetizer, bringing a nostalgic charm and unmatched creaminess to holiday platters, backyard barbecues, and family gatherings. Whether you are assembling a spread for Easter brunch, a summer picnic, or a festive winter holiday, a beautifully arranged tray of deviled eggs is always the first to disappear. The beauty of this dish lies in its simplicity: humble hard-boiled eggs are transformed into elegant, bite-sized delights with just a handful of everyday pantry staples. By balancing rich fats, sharp acids, and warm spices, this classic recipe achieves a crowd-pleasing flavor profile that stands the test of time.
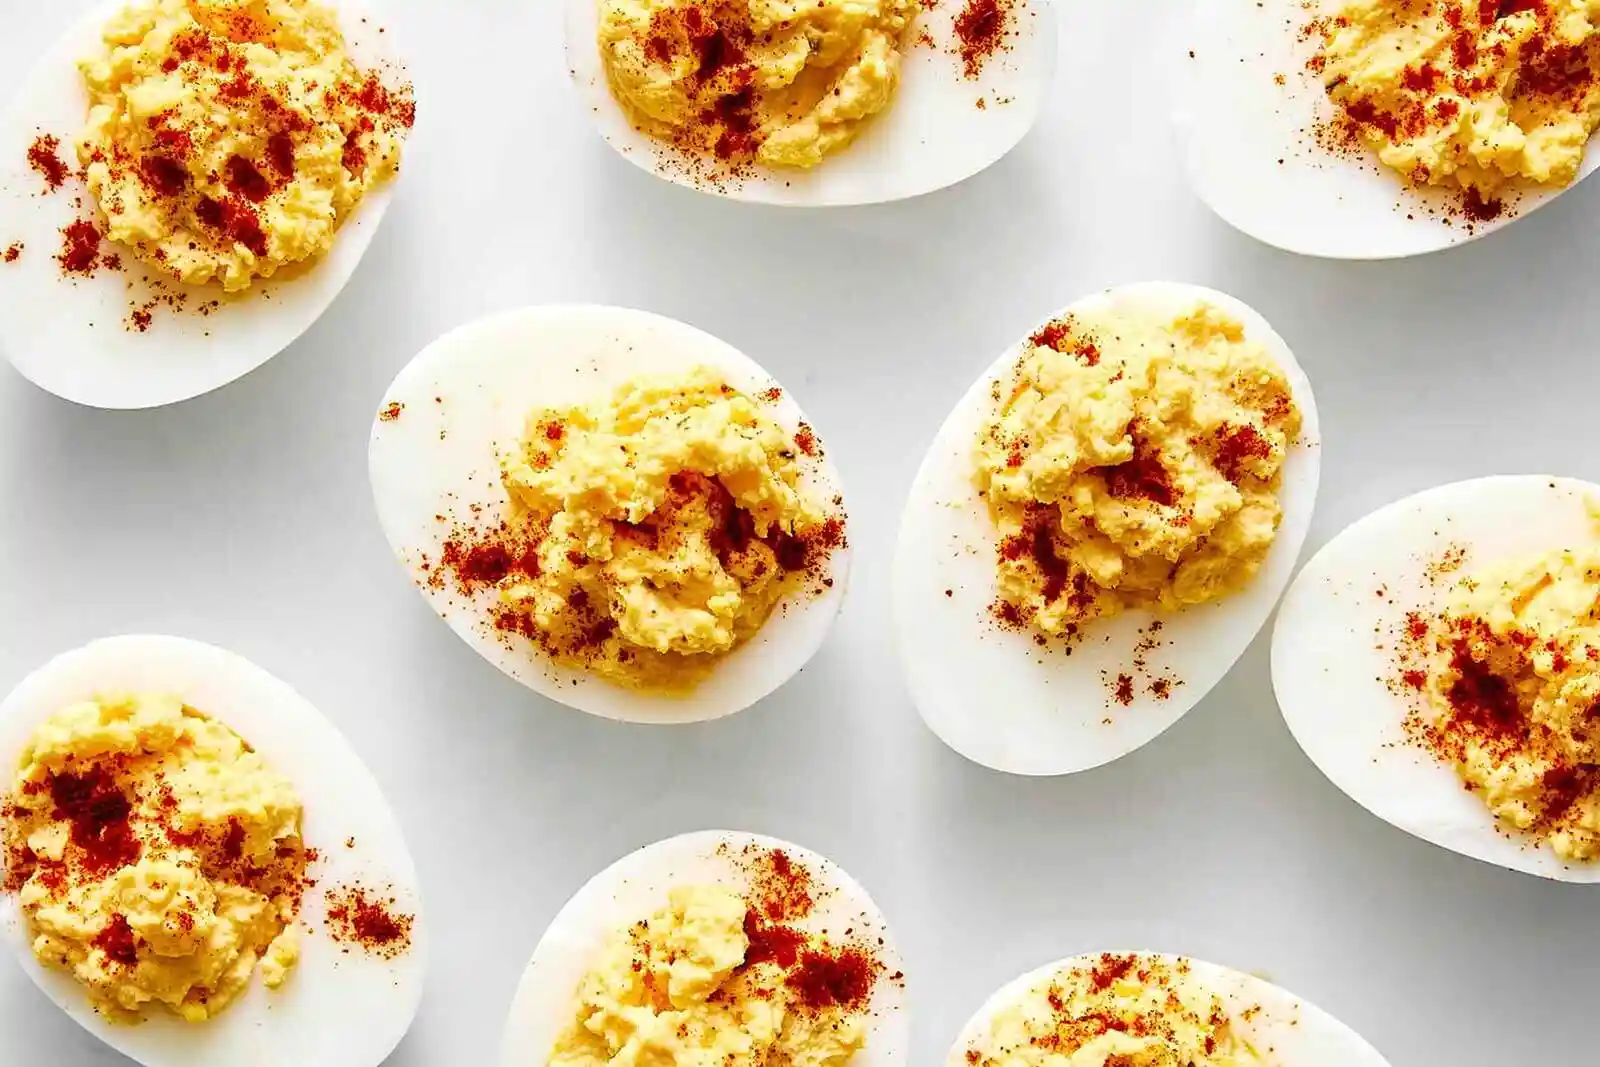
While deviled eggs are incredibly straightforward to prepare, achieving perfection requires attention to detail. From boiling the eggs to a precise level of tenderness to mastering the silky-smooth texture of the yolk filling, small techniques make a massive difference. This guide explores the foolproof culinary science behind making perfect deviled eggs, ensuring that your whites remain firm, your yolks never develop that unappealing gray-green ring, and your filling remains rich, tangy, and beautifully piped. Read on to master this traditional recipe and discover the tips that will make you the designated deviled egg maker for every future gathering.
The Curious History Behind “Deviled” Eggs
To truly appreciate this classic appetizer, it helps to understand where its famous name comes from. Long before it became a mid-century American party staple, the concept of stuffing boiled eggs with savory seasonings dates back to ancient Rome. The Romans frequently served boiled eggs seasoned with spicy sauces and herbs as a first course during banquets. However, the term “deviled” did not enter the culinary lexicon until the late 18th century in Great Britain.
In 1786, the word “devil” began appearing in print to describe dishes that were prepared with fiery, spicy, or highly seasoned ingredients—most notably mustard, pepper, and cayenne. Because these stuffed eggs relied on the sharp heat of mustard and spices to cut through the richness of the yolk, they earned the title “deviled eggs.” Today, while the heat has been tempered to suit a wide variety of palates, the name remains a beloved nod to the zesty, flavorful punch that sets these stuffed treats apart from standard hard-boiled eggs.
The Science of the Perfect Hard-Boiled Egg
The foundation of any exceptional deviled egg recipe is a perfectly cooked hard-boiled egg. There are few things more disappointing than rubbery egg whites or yolks that have turned dry, powdery, and gray around the edges. That unsightly discoloration is actually a chemical reaction: when eggs are cooked too long or at too high a temperature, the hydrogen sulfide in the whites reacts with the iron in the yolks to create ferrous sulfide, which causes the green ring and a sulfur-like smell.
To avoid this, we use a controlled boiling method. By lowering the eggs into gently simmering water rather than starting them in cold water, we make the peeling process significantly easier. The sudden heat shock causes the egg white proteins to contract rapidly, shrinking away from the inner shell membrane. Additionally, setting a precise timer for 14 minutes ensures that the yolks are fully cooked and creamy without crossing the threshold into overcooked dryness.
Following the boil immediately with an ice water bath is equally critical. The rapid cooling halts the cooking process instantly, shrinking the egg slightly within its shell and creating a small steam barrier that makes peeling effortless. This combination of thermal shock and precise timing is the secret to smooth, pristine egg whites that serve as the perfect vessels for your filling.
Essential Ingredients for Success
This recipe relies on a precise balance of textures and flavors. Because the ingredient list is short, selecting the right components is key to achieving a professional-grade result:
- Large Eggs: Standard large chicken eggs are ideal. For the easiest peeling, try to use eggs that have been in your refrigerator for a week or two rather than farm-fresh ones; older eggs have a slightly higher pH level, which prevents the white from sticking tightly to the shell membrane.
- Mayonnaise: This provides the rich, emulsified base that makes the yolk filling exceptionally smooth and spreadable. Use a high-quality, full-fat mayonnaise for the best texture and mouthfeel.
- Dijon Mustard: While yellow mustard adds a simple tang, Dijon mustard offers a deeper, more sophisticated flavor profile with subtle notes of white grape juice or vinegar and warm mustard seed heat.
- Apple Cider Vinegar: A touch of acid is vital to cut through the heavy fats of the yolk and mayonnaise. Apple cider vinegar contributes a gentle, fruity brightness that elevates the entire filling.
- Kosher Salt and Ground Black Pepper: Essential for amplifying the natural flavors of the egg and spices. Adjust these to your personal taste.
- Paprika: This vibrant red spice serves as the traditional finishing touch. A light dusting adds a hint of sweet earthiness and a beautiful contrast against the pale yellow filling and bright white eggs.
Step-by-Step Instructions
1. Boil the Eggs Perfectly
Fill a medium pot with enough water to fully submerge the eggs, and bring it to a rolling boil over high heat. Once boiling, reduce the heat to low (or temporarily turn it off) until the bubbling stops. This prevents the eggs from rattling against each other and cracking when first introduced. Gently lower the 6 large eggs into the water one by one using a skimmer or slotted spoon. Immediately turn the heat back up to high to return the water to a gentle boil, and set a timer for exactly 14 minutes.
2. Prepare the Ice Water Bath
While the eggs are boiling, prepare a medium bowl filled with cold water and plenty of ice cubes. This ice bath must be ready the moment your timer goes off. As soon as the 14 minutes are up, use your slotted spoon to transfer the hot eggs directly from the boiling water into the ice bath. Let them sit undisturbed in the ice water for at least 10 to 15 minutes to cool completely to their core.
3. Peel and Prep the Eggs
Once the eggs are thoroughly cooled, gently tap each egg on a hard surface to crack the shell all over. Gently roll the egg between your palms to loosen the shell, then begin peeling from the wider end, where the air pocket is located. Peeling the eggs while submerged in the ice bath or under a thin stream of cool running water can help wash away tiny shell fragments and slide the shell off smoothly. Carefully pat the peeled eggs dry with a paper towel. Using a sharp chef’s knife, slice each egg in half lengthwise. Gently scoop the firm yolks out with a small spoon and transfer them to a mixing bowl, arranging the empty white halves neatly on a serving platter.
4. Craft the Creamy Filling
Use a sturdy fork to thoroughly mash the egg yolks in your mixing bowl until they form fine, uniform crumbs with no large lumps remaining. Add the 3 tablespoons of mayonnaise, 1 teaspoon of Dijon mustard, and 1 teaspoon of apple cider vinegar. Season with a pinch of kosher salt and ground black pepper. Stir the mixture vigorously with your fork or a spatula until it is completely smooth, creamy, and uniform. For an incredibly fluffy, restaurant-quality filling, you can use a hand mixer or a small food processor to whip the ingredients together.
5. Pipe and Garnish
To fill the egg white cavities, you can simply spoon the yolk mixture back into each half. However, for a beautiful, elegant presentation, transfer the filling into a pastry piping bag fitted with a large star tip. Gently squeeze the bag to pipe a decorative swirl of filling into the hollow of each egg white. Right before serving, hold a jar of paprika high above the platter and gently tap it to scatter a delicate, even dust of red spice over the top of each egg.
Professional Tips for Picture-Perfect Deviled Eggs
If you want to take your deviled eggs to the next level, incorporate these simple professional secrets:
- Clean Slices: To prevent the yolk from sticking to your knife and smudging the clean edges of the whites, wipe your knife blade with a damp paper towel between every single cut.
- Stabilize Your Platter: Egg halves can sometimes slide around on a smooth serving plate. To keep them upright, cut an incredibly thin slice off the rounded bottom of each egg white half to create a flat, stable base.
- The Zip-Top Bag Hack: If you do not have a professional piping bag, scoop your yolk filling into a clean gallon-sized zip-top storage bag. Push the filling toward one bottom corner, squeeze out the excess air, seal the bag, and snip a small piece off that corner to create an instant DIY piping tool.
Flavor Variations and Creative Twists
While the classic preparation is deeply satisfying, the neutral profile of eggs makes them an excellent canvas for creative flavor profiles. Try these simple, pork-free, and alcohol-free variations:
- Smoked Salmon and Capers: Stir finely minced smoked salmon into the yolk mixture, and garnish each finished egg with a whole caper and a tiny sprig of fresh dill for an elegant brunch appetizer.
- Spicy Jalapeño: Swap the apple cider vinegar for an equal amount of pickled jalapeño juice, mix a pinch of cayenne pepper into the yolk filling, and top each egg with a thin slice of fresh jalapeño.
- Creamy Avocado: Replace half of the mayonnaise with ripe, mashed avocado. Whisk in a squeeze of fresh lime juice to keep the color vibrant green, and garnish with chopped fresh cilantro.
- Herbed Garden Deviled Eggs: Fold finely chopped fresh chives, parsley, and tarragon directly into the yolk mixture, adding a beautiful green speckle and a fresh, herbaceous aroma.
Make-Ahead Logistics and Storage Guidelines
Deviled eggs are highly amenable to advance preparation, making them a stress-free option for party hosts. To ensure they taste and look as fresh as possible, it is best to store the components separately until the day of your event.
You can hard-boil, peel, and slice the eggs up to 2 days in advance. Place the empty white halves in an airtight container, seal them tightly, and keep them refrigerated. Prepare the yolk filling as directed, transfer it to an airtight container or directly into your piping bag, press out any excess air, and seal it shut. Store the filling in the refrigerator alongside the whites.
On the day of your gathering, simply arrange the egg white halves on your serving platter, pipe the chilled yolk filling into the cavities, and finish with a fresh dusting of paprika. Avoid garnishing with paprika too far in advance, as the moisture from the filling can absorb the spice, causing the red color to bleed and run. Leftover fully assembled deviled eggs should be stored in an airtight container in the refrigerator and consumed within 2 to 3 days for optimal safety and texture.
PrintClassic Deviled Eggs Recipe: The Ultimate Guide to Perfect, Creamy Deviled Eggs
- Total Time: PT35M
- Yield: 6 servings (2 deviled eggs) 1x
- Diet: Gluten-Free, Low-Carb, Vegetarian
Description
A classic, foolproof recipe for the creamiest deviled eggs. Perfectly boiled eggs are filled with a smooth, tangy mixture of mayonnaise, Dijon mustard, and apple cider vinegar, topped with a dusting of paprika.
Ingredients
- 6 large eggs
- 3 tablespoons mayonnaise
- 1 teaspoon Dijon mustard
- 1 teaspoon apple cider vinegar
- kosher salt and ground black pepper (to taste)
- paprika (for garnish)
Instructions
- Boil Eggs: Bring a pot of water to a rolling boil. Reduce the heat to low (or turn off) to stop the bubbling. Use a skimmer or slotted spoon to gently lower the eggs into the water. Turn the heat back to high and boil for 14 minutes.
- Cool Eggs: While boiling, prepare an ice water bath. Once the 14 minutes are up, transfer the eggs immediately to the ice bath to cool completely.
- Peel and Slice: Peel the cooled eggs and slice them in half lengthwise. Carefully remove the yolks to a mixing bowl, placing the egg whites onto a plate.
- Make Filling: Mash the egg yolks thoroughly with a fork. Add mayonnaise, Dijon mustard, apple cider vinegar, salt, and pepper. Stir vigorously until completely smooth and creamy.
- Fill and Garnish: Spoon or pipe the yolk filling back into the egg white halves. Sprinkle with a light dusting of paprika before serving.
Notes
For an extra smooth and fluffy texture, use a hand mixer to whip the yolk filling. You can substitute apple cider vinegar with pickle juice if preferred.
- Prep Time: PT20M
- Cook Time: PT15M
- Category: Appetizer, Snack
- Method: Boiling
- Cuisine: American
Nutrition
- Serving Size: 1 serving (2 deviled eggs)
- Calories: 125.3 kcal
- Sugar: 0.6 g
- Sodium: 125.7 mg
- Fat: 10.5 g
- Saturated Fat: 2.4 g
- Carbohydrates: 0.7 g
- Protein: 6.4 g
- Cholesterol: 189.4 mg