
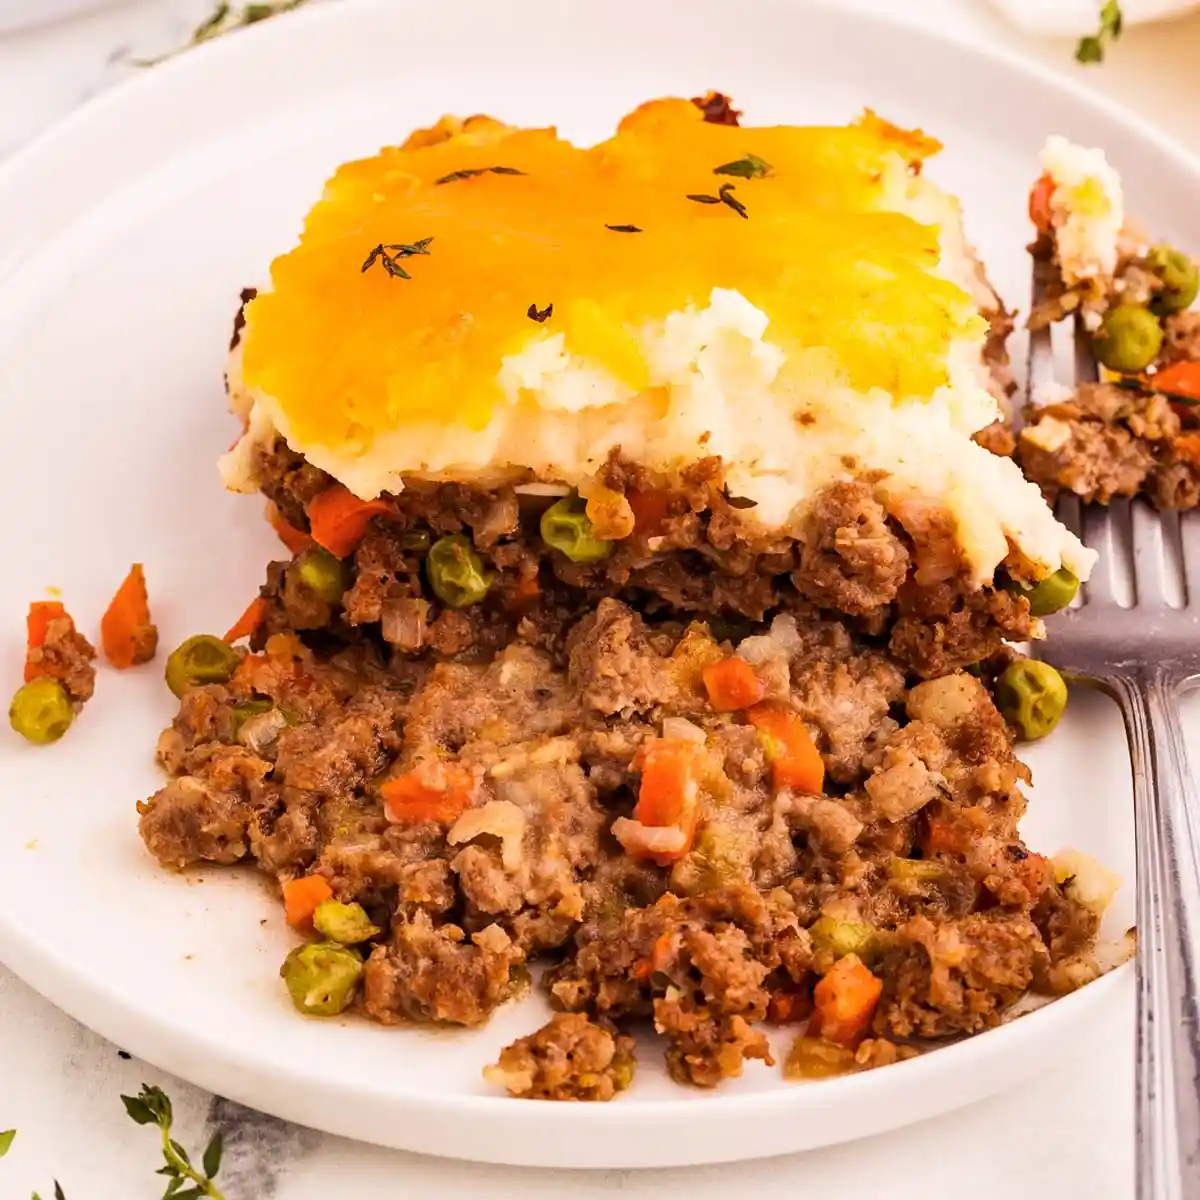
Shepherd’s pie is the ultimate expression of rustic comfort food. It combines a rich, deeply savory meat-and-vegetable filling with a fluffy, golden blanket of mashed potatoes. This dish is designed to bring warmth to any table, making it a fantastic choice for busy weeknights, cozy family gatherings, or cold weekend afternoons. While it feels special and incredibly hearty, you do not need complex kitchen skills to execute it flawlessly. With just a few simple steps, you can create a restaurant-quality meal right in your home kitchen.
Why You’ll Love This Savory Classic
There is a unique magic to a casserole that combines your main course and side dish into one beautiful, cohesive bake. The bottom layer of this dish consists of beautifully browned meat simmered with aromatic vegetables in a thick, velvety gravy. The top layer features pillowy mashed potatoes that crisp up beautifully in the oven, especially when finished with a sprinkling of sharp cheddar cheese. It is a highly satisfying, crowd-pleasing option that appeals to both children and adults alike.
Another reason to love this recipe is its sheer versatility. Whether you are looking to clear out leftover mashed potatoes from a holiday meal or want to prep a batch of freezer-friendly comfort meals for the weeks ahead, this recipe adapts beautifully. It is a highly forgiving process that rewards you with an incredibly rich flavor profile, proving that simple, wholesome ingredients can produce spectacular results.
Cottage Pie vs. Shepherd’s Pie: A Brief Culinary History
In modern culinary terms, there is a minor technical distinction between two closely related dishes. Traditionally, an authentic shepherd’s pie is made using ground lamb, reflecting the name of the shepherd who watches over the sheep. On the other hand, a cottage pie utilizes ground beef. However, in many home kitchens across the world, the term “shepherd’s pie” has lovingly expanded to encompass both variations.
This recipe uses ground beef as its base, making it incredibly accessible, affordable, and easy to find at any local grocery store. If you prefer the traditional sheep-farmer style, you can swap the beef for ground lamb. Whichever ground meat you choose, the preparation steps, vegetable ratios, and baking instructions remain identical, ensuring a spectacular result either way.
Key Ingredients and Their Roles
To achieve the deepest flavor possible, it is helpful to understand how each ingredient contributes to the success of the dish. Here is a look at what goes into this classic recipe and why:
- Ground Beef: Provides the rich, protein-packed base of the filling. Using a ground beef with a moderate fat content (such as 80/20 or 85/15) ensures the meat remains tender and flavorful during the browning process.
- The Mirepoix (Onion, Carrots, and Celery): This classic aromatic trio forms the foundational flavor of the gravy. Dicing them finely ensures they cook evenly and integrate beautifully into every bite.
- Garlic: A single, finely chopped clove adds a subtle, warm depth of flavor that complements the beef and herbs.
- White Flour: Acts as the thickening agent. When sprinkled over the browned meat and vegetables, it coats them to form a roux-like base that thickens the broth into a rich, luscious gravy.
- Tomato Paste: Adds a concentrated, slightly sweet, and highly savory acidity that deepens the overall color and flavor of the sauce.
- Beef Broth: Used in two stages. A small amount is used to deglaze the pan, lifting up all the caramelized bits from the bottom, while the remainder serves as the liquid base for the luxurious gravy.
- Frozen Peas: Introduced at the end of the filling’s cooking process to maintain their vibrant green color and sweet pop of texture.
- Fresh Herbs (Parsley, Thyme, and Rosemary): These fresh elements elevate the filling, introducing earthy, aromatic notes that balance the heavy, savory qualities of the beef and gravy.
- Mashed Potatoes: Fluffy, starchy potatoes (like Russet or Yukon Gold) are mashed with butter and cream to create the perfect cloud-like topping.
- Cheddar Cheese: A sprinkling of shredded cheddar on top of the potatoes melts into a gorgeous, golden, and crispy crust.
Step-by-Step Instructions
1. Brown the Meat and Sauté the Aromatics
Begin by heating 1 tablespoon of oil over medium-high heat in a large, deep skillet. Once the oil is hot and shimmering, add 1 pound of ground beef. Break the meat apart with a sturdy spatula, stirring occasionally. Allow the beef to sit long enough to develop a deep, caramelized crust on the edges, as this caramelization is crucial for building a complex base of flavor. Once the meat is fully browned, add 1 chopped garlic clove, 2 finely chopped onions, 2 finely diced medium carrots, and 2 finely diced celery sticks to the skillet. Stir everything together and sauté the mixture for about 5 to 7 minutes, or until the vegetables are softened and fragrant.
2. Create the Gravy Base and Deglaze
With your meat and vegetables softened, sprinkle 1/2 teaspoon of salt, 1/4 teaspoon of ground paprika, ground black pepper to taste, and 2 tablespoons of white flour evenly over the skillet. Cook, stirring constantly, for about 2 minutes. This step is essential to cook out the raw flavor of the flour. Next, stir in 2 tablespoons of tomato paste, cooking for about 1 minute until it smells deeply roasted. To deglaze the pan, pour in 1/3 cup of beef broth. Use your spatula to firmly scrape up any browned, caramelized bits stuck to the bottom of the skillet—these bits are packed with concentrated flavor.
3. Simmer and Cool the Filling
Pour in the remaining 1 cup of beef broth and stir. Add 1 cup of frozen peas, 1 tablespoon of finely chopped parsley, 1/2 teaspoon of finely chopped thyme, and 1 teaspoon of finely chopped rosemary. Bring the mixture to a gentle simmer and let it cook for 4 to 5 minutes, allowing the gravy to thicken into a rich, hearty consistency. Once thickened, transfer the savory filling into a 7×11-inch baking dish. Spread it out into a flat, even layer. Let the filling cool in the dish for about 15 to 30 minutes. Cooling the filling is a critical step; it allows the gravy to set slightly, which prevents the mashed potatoes from sinking directly into the meat when you spread them on top.
4. Prepare and Apply the Potato Topping
While the meat filling is cooling, prepare your mashed potatoes. You will need approximately 4 cups of smooth, fluffy mashed potatoes (roughly 1.5 pounds of peeled potatoes). Gently spoon the warm mashed potatoes over the cooled filling. Using an offset spatula or the back of a spoon, spread the potatoes evenly across the top, taking care not to disturb the beef layer underneath. Once spread, use the tines of a fork to lightly drag a criss-cross pattern across the surface of the potatoes. These little ridges will catch the heat of the oven, resulting in incredibly crispy, golden edges. Finish by evenly sprinkling 1/2 cup of shredded cheddar cheese over the textured potatoes.
5. Bake to Golden Perfection
Preheat your oven to 400°F (200°C). Place your baking dish onto a lined baking sheet to catch any savory gravy bubbles that might spill over during the baking process. Bake the pie in the preheated oven for 20 minutes, or until the cheese is completely melted, the edges are bubbling, and the potato ridges are a gorgeous golden-brown color. Once baked, remove the dish from the oven and allow it to rest for about 5 minutes before serving. Resting allows the layers to settle, making it much easier to scoop and serve neat, beautiful portions.
Golden Rules for the Perfect Crispy Potato Top
Achieving that iconic, golden-brown contrast between the creamy interior and the crispy top layer of your mashed potatoes is easier than you think. First, always choose starchy potatoes, such as Russet or Yukon Gold, for your mash. These varieties contain less water and mash into a much fluffier texture, which browns beautifully in the oven.
Second, do not skip the fork trick! Dragging a fork across the top of your spread potatoes creates tiny peaks and valleys. The peaks dry out slightly faster in the high heat of the oven, transforming into crispy, toasted bites while the valleys remain soft and creamy. Additionally, ensuring your potato layer is warm when you spread it onto the cooled meat layer helps the potatoes stay light and easy to work with, preventing them from mixing with the rich gravy below.
Smart Recipe Variations and Substitutions
This recipe serves as a brilliant blueprint that can easily be customized to fit your dietary preferences or what you currently have inside your pantry:
- Vegetarian Version: Swap the ground beef for 2 cups of cooked brown lentils, and replace the beef broth with a high-quality vegetable broth. The lentils mimic the texture of ground meat beautifully while soaking up all the herbal aromatics.
- Low-Carb Option: Swap the mashed potatoes for a rich mashed cauliflower. To help the cauliflower mash brown and hold its shape in the oven, whisk one egg yolk into the mixture before spreading it over the filling.
- Vegetable Swaps: If you or your family members are not fans of green peas, feel free to swap them out for finely chopped green beans, sweet corn, or even a frozen mixed vegetable blend to save prep time.
- Alternative Cheese: While sharp cheddar cheese is a classic choice, you can substitute it with Swiss cheese, Gruyère, or even some grated Parmesan for a different flavor profile.
Storage, Freezing, and Reheating Instructions
This dish is incredibly meal-prep friendly and tastes even better the next day as the savory flavors have had more time to meld together. Store any leftovers in an airtight container in your refrigerator for up to 3 days.
To reheat leftovers, you can use the oven or the microwave. For the oven, place the desired portions in a baking dish, cover with foil to prevent the potatoes from drying out, and heat at 350°F (175°C) for 15 to 20 minutes until piping hot. For a quick microwave option, place a portion on a microwave-safe plate, cover with a paper towel, and heat in 30-second bursts, stirring the meat layer slightly to ensure even heating.
If you would like to freeze this casserole, assemble the entire pie inside a freezer-safe dish, but do not bake it. Wrap it tightly in a layer of plastic wrap, followed by a sturdy layer of aluminum foil. It can be frozen for up to 2 months. When you are ready to enjoy it, bake it directly from frozen! Remove the plastic wrap, cover the dish with foil, and bake at 400°F (200°C) for 1 hour. Remove the foil and bake for an additional 10 to 15 minutes to allow the cheese to melt and the top to turn golden-brown.
What to Serve with Your Shepherd’s Pie
Because this casserole is highly satisfying and contains starch, protein, and vegetables all in one dish, you do not need much to complete the meal. A simple, crisp green salad tossed with a light vinaigrette provides a wonderful, refreshing contrast to the rich, savory gravy and creamy potatoes.
For a festive touch or a larger gathering, serve it alongside some warm crusty bread or traditional soda bread to swipe up any leftover gravy on your plate. Roasted green vegetables, such as roasted Brussels sprouts, asparagus, or steamed broccoli, also make fantastic side dishes that complement the comforting nature of this bake.
PrintHomemade Shepherd’s Pie Recipe (With Tips to Make It Perfect!)
- Total Time: PT75M
- Yield: 6 servings 1x
Description
This Shepherd’s Pie is the ultimate comfort food, with a rich, savory filling topped with creamy mashed potatoes. It’s easy to make, perfect for busy weeknights or cozy family dinners!
Ingredients
- 1 tablespoon oil
- 1 pound ground beef
- 1 clove garlic, chopped
- 2 onions, finely chopped
- 2 medium carrots, finely diced
- 2 sticks celery, finely diced
- 1/2 teaspoon salt
- 1/4 teaspoon ground paprika
- ground black pepper to taste
- 2 tablespoons white flour
- 2 tablespoons tomato paste
- 1/3 cup beef broth (for deglazing)
- 1 cup beef broth
- 1 cup frozen peas
- 1 tablespoon finely chopped parsley
- 1/2 teaspoon finely chopped thyme
- 1 teaspoon finely chopped rosemary
- 4 cups mashed potatoes
- 1/2 cup shredded cheddar cheese
Instructions
- Brown meat and vegetables: Heat 1 tablespoon oil over medium-high heat in a large, deep skillet. Brown 1 pound ground beef, then add 1 chopped garlic clove, 2 finely chopped onions, 2 finely diced carrots, and 2 finely diced celery sticks. Sauté until the vegetables are softened.
- Season and deglaze: Sprinkle 1/2 teaspoon salt, 1/4 teaspoon paprika, black pepper to taste, and 2 tablespoons white flour over the mixture. Cook for 2 minutes, stirring often. Stir in 2 tablespoons tomato paste and cook for 1 minute. Pour in 1/3 cup beef broth, scraping any browned bits off the bottom of the skillet.
- Finish filling and cool: Stir in the remaining 1 cup beef broth, 1 cup frozen peas, 1 tablespoon chopped parsley, 1/2 teaspoon chopped thyme, and 1 teaspoon chopped rosemary. Simmer for 4 to 5 minutes. Transfer to a 7×11-inch baking dish and allow to cool slightly.
- Prep mash: If not already made, prepare your favorite mashed potatoes (you will need about 4 cups, from roughly 1.5 pounds of peeled potatoes).
- Assemble and bake: Preheat your oven to 400°F (200°C). Gently spread the mashed potatoes over the cooled filling. Use a fork to create criss-cross ridges on the surface, then sprinkle with 1/2 cup shredded cheddar cheese. Place the baking dish on a lined baking sheet and bake at 400°F for 20 minutes, or until the top is golden and bubbling. Let rest 5 minutes before serving.
Notes
Cooling the filling slightly before topping it with mashed potatoes prevents the layers from mixing. Baking on a lined sheet pan catches any bubbling spills and keeps your oven clean.
- Prep Time: PT30M
- Cook Time: PT45M
- Category: Main Course
- Method: Baking
- Cuisine: British, Irish
Nutrition
- Serving Size: 1 serving
- Calories: 377 kcal
- Sugar: 6 g
- Sodium: 562 mg
- Fat: 15 g
- Saturated Fat: 4 g
- Unsaturated Fat: 0
- Trans Fat: 0
- Carbohydrates: 45 g
- Fiber: 5 g
- Protein: 24 g
- Cholesterol: 56 mg