
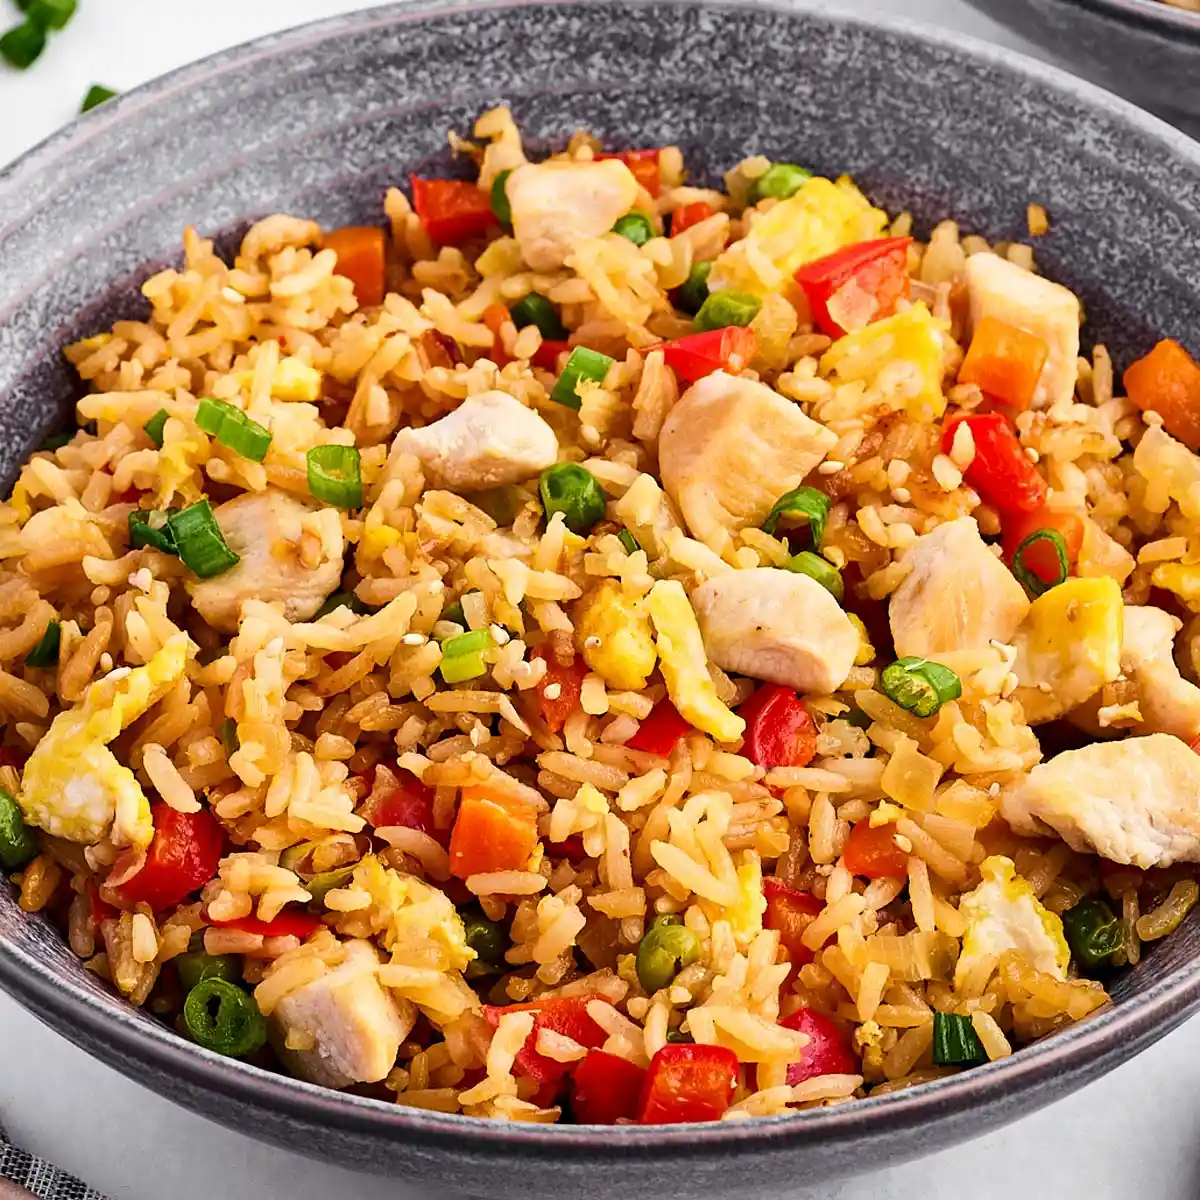
Craving the savory, comforting taste of takeout but want a meal that is fresher, lighter, and ready in a fraction of the time? This chicken fried rice recipe is the ultimate solution. Perfect for busy weeknights, it transforms simple ingredients and cold, leftover rice into a high-heat, high-flavor masterpiece. By cooking everything in a single pan, you minimize cleanup while maximizing the rich, caramelized flavors that develop when vegetables, seasoned chicken, and rice hit a sizzling hot surface.
Why This Chicken Fried Rice Method Works
Many home cooks struggle with soggy or clumpy fried rice. The secret to achieving that coveted, restaurant-style texture lies in how you sequence the ingredients and manage the heat of your pan. Instead of crowding the pan and letting the ingredients steam, this recipe breaks the process down into logical, high-heat stages. Cooking the chicken first allows it to brown beautifully, leaving savory, caramelized bits (fond) on the bottom of the pan. The vegetables are then sautéed in those flavorful juices, and the cold rice is given its own dedicated space to crisp up. By the time you toss everything together with the eggs and a touch of sweetness to balance the savory soy sauce, every single element has been cooked to its absolute peak texture.
The Importance of Using Cold, Leftover Rice
If there is one non-negotiable rule for exceptional fried rice, it is this: use cold, pre-cooked rice. Freshly cooked rice is warm, moisture-rich, and full of active starches. If you try to stir-fry it immediately, the moisture will release into the pan, creating a sticky, mushy mess instead of distinct, chewy grains.
Chilling the cooked rice in the refrigerator for at least a day dries out the exterior of the grains and allows the starches to firm up (a process called starch retrogradation). When this cold, dry rice hits the hot pan with oil, the outer layer quickly crisps up and seals, keeping the inside tender while preventing the grains from clumping together.
What to Do If You Only Have Fresh Rice
If you have a sudden craving and do not have day-old rice in the fridge, do not despair. You can mimic the drying process with this quick technique:
- Cook your rice as you normally would, using slightly less water than usual to keep the grains firm.
- Spread the hot, cooked rice in a thin, even layer across a large rimmed baking sheet.
- Place the baking sheet in the refrigerator (or even the freezer for a few minutes) uncovered for 30 minutes. This rapidly cools the rice and evaporates the excess surface moisture, making it ready for the wok.
Selecting the Right Rice Variety
For the best results, stick to dry, long-grain rice varieties. Jasmine rice is the gold standard for fried rice because of its subtle floral aroma and clean, separate grains. Standard long-grain white rice or Basmati rice also work beautifully. Avoid short-grain varieties like sushi rice or arborio (risotto) rice; these contain high amounts of amylopectin starch, which makes them inherently sticky and prone to clumping when stir-fried.
Key Ingredients and Smart Substitutions
- Oil: A neutral, high-smoke-point oil is crucial for high-heat cooking. Canola, peanut, safflower, or grape-seed oil are perfect. If you love a rich, nutty depth, drizzle a teaspoon of toasted sesame oil over the dish right before serving.
- Chicken: Boneless, skinless chicken breast or chicken thighs work equally well. Cut them into uniform, bite-sized pieces so they cook rapidly and evenly. Be sure to season them with salt and pepper before they hit the pan.
- Vegetables: A combination of finely chopped yellow onion, red bell pepper, and a frozen pea-and-carrot blend provides a colorful, sweet, and crisp-tender texture. You can easily customize this with other quick-cooking vegetables like sweet corn, edamame, or finely chopped broccoli.
- Aromatics: Freshly minced garlic is essential. Grated fresh ginger is optional but highly recommended to add a bright, zesty contrast to the savory sauce.
- Soy Sauce: This provides the core savory, umami flavor. Standard soy sauce is perfect, but you can use low-sodium soy sauce if you prefer to control the salt level yourself, or tamari for a gluten-free alternative.
- Sweetener: A tablespoon of honey or maple syrup helps balance the saltiness of the soy sauce and aids in the caramelization of the rice grains. You can also use brown sugar in its place.
- Eggs: Two beaten eggs, gently scrambled directly in the pan, add a rich, velvety texture and extra protein.
- Green Onions & Toppings: Sliced green onions (scallions) added at the very end provide a fresh, sharp bite. Toasted sesame seeds add a delightful crunch.
Step-by-Step Cooking Guide
Step 1: Sear the Chicken
Set a large, heavy-bottomed skillet or a traditional wok over medium-high heat. Add 1 tablespoon of oil. Once the oil is hot and shimmering, add the seasoned, diced chicken breast. Spread it out so that the pieces have direct contact with the pan. Cook, stirring occasionally, for 5 to 6 minutes. You want the chicken to be fully cooked through and develop a lovely golden-brown crust. Transfer the cooked chicken to a clean plate and set it aside, leaving any browned bits in the pan for extra flavor.
Step 2: Sauté the Aromatics and Vegetables
Keep the heat at medium-high and add the remaining tablespoon of oil to the same pan. Toss in the finely chopped yellow onion and diced red bell pepper. Sauté these for 2 to 3 minutes until they begin to soften. Next, add the frozen pea-and-carrot blend directly from the freezer. Stir-fry for another 3 to 4 minutes until the vegetables are tender yet retain their vibrant colors. Finally, stir in the minced garlic and grated ginger (if using). Cook for just 30 seconds, stirring constantly, until you smell their warm, sweet aroma. Do not let the garlic burn, as it will turn bitter.
Step 3: Fry the Rice and Sizzle the Sauce
Push your cooked vegetables to one side of the skillet to clear a space. Add the 3 cups of chilled, cooked rice to the empty side of the pan. Drizzle the soy sauce and honey (or maple syrup) directly over the rice. Use your spatula to gently break up any clumps of rice, then toss the rice and vegetables together until everything is evenly coated in the sauce. Spread the mixture into a flat, even layer across the surface of the pan. Let it cook undisturbed for about 2 minutes. This is the secret step that allows the rice to fry and develop delicious, slightly crispy caramelized edges. Stir the mixture and repeat for another 2 minutes.
Step 4: Scramble the Eggs
Push the rice and vegetable mixture to the outer edges of the pan again, creating a clear well in the center. Pour the beaten eggs directly into this cleared space. Turn the heat down to medium and stir the eggs gently. Once they are softly set but still tender, break them up into small pieces with your spatula and fold them into the surrounding rice and vegetables.
Step 5: Combine and Heat Through
Return the cooked chicken and any juices from the plate back into the pan. Add the sliced green onions. Toss the entire mixture together thoroughly. Continue cooking and stirring for 2 to 3 minutes until the chicken is hot and the green onions are slightly wilted. Taste the fried rice and add a splash more soy sauce or a pinch of salt if desired.
Step 6: Garnish and Serve
Remove the pan from the heat. Spoon the steaming hot chicken fried rice into bowls. Garnish generously with extra sliced green onions, a sprinkle of toasted sesame seeds, and a tiny drizzle of toasted sesame oil if you like. Serve immediately while it is hot and fragrant.
Top Tips for Chicken Fried Rice Success
- Prepare Your Mise en Place: Because stir-frying happens very quickly over high heat, you will not have time to chop vegetables or beat eggs once the cooking begins. Have all your ingredients prepped, measured, and placed in small bowls near your stove before you turn on the burner.
- Keep the Heat High: Fried rice relies on high heat to sear the ingredients rather than steaming them. If your stove runs cold, cook in smaller batches so you do not overcrowd the pan.
- Use a Large Pan: A spacious wok or a large, 12-inch skillet ensures that the ingredients have plenty of surface area to fry properly.
- Do Not Over-Stir: Give the rice time to sit against the hot pan surface. That contact time is what creates the caramelized, slightly crispy textures that define high-quality fried rice.
Creative Variations
Once you master this simple, one-pan technique, you can easily adapt this recipe to suit whatever ingredients you have in your kitchen:
- Shrimp Fried Rice: Replace the chicken with peeled and deveined shrimp. Sear them in hot oil for 2 to 3 minutes until pink, then remove from the pan and stir them back in at the end.
- Veggie-Loaded Fried Rice: Skip the meat entirely and add a mixture of baby spinach, sliced mushrooms, baby corn, or water chestnuts for an ultra-crunchy, colorful vegetarian version.
- Spicy Fried Rice: Stir a tablespoon of sriracha, chili-garlic sauce, or gochujang into the soy sauce and honey mixture before pouring it over the rice.
- Noodle Fried Rice: Swap out the rice for cooked and cooled ramen noodles, rice noodles, or even spaghetti for a playful, fusion-style noodle stir-fry.
What to Serve with Fried Rice
While this chicken fried rice is a complete, satisfying meal on its own, you can easily turn it into an elaborate feast. Pair it with crispy egg rolls, fresh spring rolls, or a simple, crisp green salad tossed with a bright ginger dressing. Steam some garlic broccoli or green beans on the side, or serve it alongside fresh, sweet pineapple slices to contrast the deep, savory flavors of the soy sauce.
Food Safety and Leftover Rice Guidelines
When cooking with rice, it is important to practice proper food safety. Uncooked rice can contain spores of Bacillus cereus, a bacterium that can survive the cooking process. If cooked rice is left sitting at room temperature, these spores can multiply and produce toxins that cause foodborne illness. To keep your kitchen safe, always follow these rules:
- Cool cooked rice quickly by spreading it on a baking sheet, then transfer it to a sealed container and refrigerate it immediately (within an hour of cooking).
- Keep chilled rice in the refrigerator for no more than 24 hours before making fried rice.
- Ensure that you reheat the rice thoroughly during the frying process so that it is piping hot throughout.
- Because rice should not be reheated multiple times, we do not recommend storing and reheating leftovers of this dish after it has been fried. Cook only what you plan to enjoy immediately!
Easy Chicken Fried Rice Recipe
- Total Time: PT40M
- Yield: 4 servings 1x
Description
An incredibly fast, flavorful, and easy-to-make chicken fried rice. It features tender chicken, colorful vegetables, and perfectly crisp grains of rice tossed in a light, sweet-and-savory glaze.
Ingredients
- 2 tablespoons oil (canola, sesame, peanut, or a blend, or more if needed)
- 1 pound boneless skinless chicken breast, diced into bite-sized pieces and seasoned with salt and pepper
- 1 medium yellow onion, finely chopped (about 1 cup)
- 1 cup frozen pea-and-carrot blend
- 1 red bell pepper, finely diced
- 2 cloves garlic, minced (plus 1 teaspoon grated ginger, optional)
- 3 cups cooked and chilled rice (jasmine or long-grain)
- 3 tablespoons soy sauce
- 1 tablespoon honey or maple syrup
- 2 large eggs, beaten
- 3 green onions, sliced
- toppings to serve (optional: sesame seeds, toasted sesame oil, extra green onions)
Instructions
- Cook the chicken: Heat 1 tablespoon of oil in a large skillet or wok over medium-high heat. Add the diced, seasoned chicken and cook, stirring occasionally, until browned and fully cooked through (about 5–6 minutes). Remove the chicken from the skillet and set aside on a clean plate.
- Sauté the vegetables: To the same skillet, add the remaining 1 tablespoon of oil. Add the chopped onion and red bell pepper, and sauté for 2–3 minutes until they begin to soften. Add the frozen pea-and-carrot blend and continue cooking for 3–4 minutes. Stir in the minced garlic (and ginger, if using) and cook for 30 seconds until highly fragrant.
- Add rice and sauce: Push the sautéed vegetables to one side of the skillet. Add the chilled, dry rice to the cleared side and drizzle with the soy sauce and honey (or maple syrup). Toss the rice and vegetables together, then spread the mixture out into an even layer. Let it cook undisturbed for 2 minutes, then stir and cook for another 2 minutes to allow the rice to get slightly crispy.
- Scramble the eggs: Push the rice and vegetable mixture to the outer edges of the skillet. In the cleared space in the center, pour in the beaten eggs. Cook over medium heat, stirring gently, until just set. Break the scrambled eggs into small pieces with your spatula and fold them into the surrounding rice.
- Finish: Return the cooked chicken and any accumulated juices to the skillet, along with the sliced green onions. Stir everything together well and cook for 2–3 minutes until all ingredients are completely heated through.
- Serve: Remove from the heat. Garnish with additional green onions and toasted sesame seeds if desired, and serve immediately.
Notes
Always use cold, day-old rice for the best texture. If you must use fresh rice, spread it flat on a baking sheet and freeze or refrigerate it for 30 minutes to dry out the starch before cooking. We do not recommend storing and reheating leftover fried rice for food safety reasons.
- Prep Time: PT20M
- Cook Time: PT20M
- Category: Main Course
- Method: Stir-Fry
- Cuisine: American, Asian
Nutrition
- Serving Size: 1 serving
- Calories: 378 kcal
- Sugar: 10 g
- Sodium: 599 mg
- Fat: 9 g
- Saturated Fat: 2 g
- Carbohydrates: 41 g
- Fiber: 4 g
- Protein: 32 g
- Cholesterol: 154 mg