
This recipe produces pillowy soft and tender Greek pitas that are perfect for Mediterranean meals. They serve as an ideal base for gyros, wraps, or as a side for various dips.

List of ingredients
- 1 ½ cups all purpose flour (plus extra for dusting) – provides the main structure and elasticity.
- 1 tablespoon active dry yeast – essential for the dough to rise and create air pockets.
- 1 teaspoon kosher salt – balances the flavor and controls the yeast activity.
- ⅓ cup milk (warm) – adds tenderness and helps the yeast activate.
- ⅓ cup water (warm) – provides necessary hydration for the flour.
- 2 tablespoons olive oil (plus more for the bowl and cooking) – ensures a soft texture and prevents sticking.
step-by-step instructions
- Mix Dry Base: In a large mixing bowl, combine the all-purpose flour, active dry yeast, and kosher salt. Stir well to ensure the yeast and salt are evenly distributed.
- Add Warm Liquids: Pour the warm milk and warm water into the flour mixture. Stir until the ingredients are fully combined and a rough dough forms.
- Knead the Dough: Pour in the olive oil. Knead the dough directly in the bowl for several minutes until it forms a smooth, elastic ball.
- Prepare for Proofing: Use a brush or your fingers to coat a bowl with olive oil. Place the kneaded dough ball into the oiled bowl.
- Let the Dough Rise: Cover the bowl tightly with plastic wrap. Leave it in a warm spot for approximately one hour until it has doubled in size.
- Divide Portions: Dust a clean surface with flour and place the dough on it. Cut the dough into 8 equal-sized pieces.
- Initial Shaping: Gently stretch each piece of dough into a circle using your hands. Use a rolling pin to roll it out to a thickness of about ¼ inch.
- Final Stretch: Using your hands, gently stretch each dough circle until it is approximately 7-8 inches wide.
- Sear the Pita: Heat a cast iron pan over high heat and add 1 teaspoon of olive oil. Place one pita in the pan and cook for about a minute. Drizzle a small amount of oil on top, flip the pita, and cook the other side for another minute.
- Optional Garnish: Once all pitas are cooked, you may brush the tops with melted garlic and herb butter for extra flavor.
Ways to Customize Your Pita Dough
Incorporating Dried Herbs
You can mix dried oregano, thyme, or rosemary directly into the flour before adding the liquids. This infuses the bread with an earthy aroma throughout the dough. Ensure the herbs are finely crushed to avoid large clumps in the pita.
Infusing Garlic Flavor
For a pungent garlic taste, mince fresh garlic and sauté it briefly in the olive oil before adding the oil to the dough. This distributes the garlic flavor more evenly than adding raw minced pieces. Allow the oil to cool slightly so it does not kill the yeast.
Adding Seeds for Texture
Sprinkle sesame seeds, poppy seeds, or nigella seeds on the surface of the dough before rolling it out. Press the seeds lightly into the dough so they adhere during the cooking process. This adds a nutty flavor and a professional appearance to the bread.
Using Mediterranean Spices
Experiment by adding a pinch of ground cumin or coriander to the dry ingredients. These spices complement the flavors of traditional Greek fillings like lamb or chicken. Keep the quantities small to ensure the spice does not overpower the natural wheat flavor.
Integrating Chopped Spinach
Finely chop fresh spinach and squeeze out all excess moisture before folding it into the dough. This creates a green-tinted pita with added nutrients. Be careful not to add too much spinach, as the extra moisture can make the dough difficult to roll.
Adding Sun-Dried Tomatoes
Incorporate finely diced sun-dried tomatoes into the dough during the kneading phase. Use oil-packed tomatoes but pat them dry with a paper towel first. This adds a concentrated, tart flavor and colorful red flecks to the finished pitas.
Ingredient Alternatives and Substitutions
Using Whole Wheat Flour
You can replace all or half of the all-purpose flour with whole wheat flour for a heartier texture. Because whole wheat flour absorbs more liquid, you may need to add an extra tablespoon of water or milk. The resulting pita will be denser and less fluffy.
Substituting Different Salt Types
If you do not have kosher salt, you can use fine-grain sea salt or table salt. Be mindful that table salt is denser, so use slightly less than a full teaspoon to avoid over-salting. Salt is critical for regulating the yeast fermentation speed.
Utilizing Instant Yeast
Instant yeast can be used as a direct replacement for active dry yeast. Unlike active dry yeast, instant yeast does not strictly require blooming in warm water. Mix it directly with the flour and proceed with the recipe as usual.
Alternative Cooking Oils
While extra-virgin olive oil provides the most authentic flavor, canola or vegetable oil can be used. These neutral oils have a higher smoke point, which is beneficial for high-heat searing. However, you will lose the characteristic Mediterranean taste.
Gluten-Free Flour Options
To make this recipe gluten-free, use a high-quality 1:1 gluten-free flour blend that contains xanthan gum. You may need to adjust the kneading time since gluten-free dough does not develop elasticity like wheat dough. Expect a different texture and less puffing.
Pro Baking and Cooking Tips
Verify Yeast Freshness
Before mixing, test your yeast by combining a small amount with warm water and a pinch of sugar. If it does not foam within ten minutes, the yeast is expired and will not make the dough rise. Always use fresh yeast to ensure the pitas are fluffy.
Maintain Consistent Thickness
Avoid rolling the dough too thin, as this prevents the pita from puffing up during cooking. A thickness of ¼ inch is ideal for creating the internal pocket. Use a ruler if necessary to ensure consistency across all eight pitas.
Prioritize the Proofing Stage
Do not skip the one-hour resting period, as this is when the yeast produces the carbon dioxide needed for lift. If your kitchen is cold, place the dough in a turned-off oven with the oven light on. The light provides a consistent, gentle warmth.
Selecting High-Quality Olive Oil
The flavor of the pita is significantly improved by using a high-quality extra-virgin olive oil. Look for oil that is cold-pressed and has a fruity or peppery profile. This oil contributes both to the taste and the softness of the crumb.
Ensuring the Pan is Hot Enough
The pan must be very hot before the dough hits the surface to trigger the immediate steam release that causes puffing. Test the heat by dropping a small bead of water on the pan; it should dance and evaporate instantly. High heat is the secret to a fast cook and a soft interior.
Serving Pitas Warm
Pitas are at their peak texture immediately after cooking. Serve them warm to maintain their flexibility and softness. If they cool down, they may become stiff, requiring a brief reheating process to restore their pliability.
Serving and Pairing Suggestions
Mediterranean Dip Ideas
Pair these pitas with traditional dips such as tzatziki, which is made from Greek yogurt, cucumber, and garlic. Hummus or baba ganoush provide creamy, savory alternatives. Olive tapenade or whipped feta with lemon also pair excellently with warm bread.
Building a Mezze Platter
Create a diverse spread by placing sliced pitas alongside olives, feta cheese, and sliced cucumbers. Add grilled halloumi and roasted red peppers for a complete appetizer tray. This allows guests to tear and dip the bread into various flavors.
Assembling Chicken Gyros
Fill a warm pita with marinated grilled chicken strips and sliced red onions. Add fresh tomatoes, shredded lettuce, and a generous dollop of tzatziki sauce. Fold the pita into a wrap and secure it with parchment paper for easy eating.
Creating Flavorful Wraps
Use the pitas as wraps for Mediterranean meatballs or chicken kofta. Add a side of herb-infused yogurt sauce and pickled vegetables for acidity. These wraps are portable and make for a satisfying and balanced lunch.
Storage and Freshness Guide
Refrigeration Methods
Store leftover pitas in a sealed plastic bag or an airtight container in the refrigerator. They will remain fresh for about 3 to 4 days. Ensure they are completely cooled before bagging to prevent condensation and sogginess.
Freezing for Long-Term Use
Pitas can be frozen for up to two months without losing quality. Place a piece of parchment paper between each pita to prevent them from sticking together. Store them in a heavy-duty freezer bag to avoid freezer burn.
Reheating for Softness
To reheat, place the pita in a 350°F oven for a few minutes or on a pan over medium-low heat. For maximum softness, sprinkle a few drops of water on the bread before heating. This creates steam that restores the fluffy texture.
Preparing Dough in Advance
You can prepare the dough a day before and store it in the refrigerator overnight. The slow fermentation process in the fridge can actually enhance the flavor of the bread. Bring the dough back to room temperature before shaping and cooking.
Troubleshooting Common Issues
Why Pitas Do Not Puff
If your pitas remain flat, the pan temperature was likely too low. Ensure the pan is preheated on high heat for several minutes before adding the dough. Additionally, check that you didn’t roll the dough too thin.
Dealing with Unrisen Dough
If the dough fails to double in size, the yeast may be inactive or the liquid was too hot, killing the yeast. The ideal liquid temperature is between 105°F and 115°F. Always verify your yeast bloom before starting.
Handling Sticky Dough
If the dough is too sticky to handle, gradually add one tablespoon of flour at a time while kneading. Avoid adding too much flour, as this can make the final pitas dense and dry. Use a light touch and a floured surface.
Preventing Burnt Pitas
Because the pan is on high heat, pitas can burn quickly if left too long. Stick to the one-minute-per-side rule. If the pitas are browning too fast, lower the heat slightly to medium-high.
Frequently Asked Questions
Can I use a non-stick pan?
Yes, a non-stick pan works, but a cast iron skillet is preferred because it retains heat more effectively. Consistent high heat is what causes the pita to puff up, and cast iron provides the best thermal mass for this.
How do I know when the dough is kneaded enough?
The dough is ready when it is smooth, elastic, and no longer sticks to the sides of the bowl. When you press it with your finger, it should spring back slowly rather than remaining indented.
Can I use cold water and milk?
Cold liquids will not activate the yeast effectively, leading to a very slow rise or no rise at all. Always warm your liquids to about 110°F to ensure the yeast activates quickly and the dough proofs correctly.
Print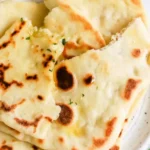
Homemade Greek Pita Bread
- Total Time: 1 hour 18 minutes
- Yield: 8 pita bread 1x
- Diet: Vegetarian
Description
This Greek pita recipe is pillowy soft, fluffy, and tender, making it the perfect base for virtually any Mediterranean meal. Use it for gyros, dips, or even as a twist on your regular sandwich wrap.
Ingredients
- 1 ½ cups all purpose flour (plus more for surface)
- 1 tablespoon active dry yeast
- 1 teaspoon kosher salt
- ⅓ cup warm milk
- ⅓ cup warm water
- 2 tablespoons olive oil (plus more for the bowl and cooking)
Instructions
- Step: In a large bowl, combine the flour, yeast, and salt, mix to combine.
- Step: Add the warm milk and water and mix to combine.
- Step: Lastly, add the olive oil and knead the dough in the bowl for a few minutes until the dough forms together into a ball.
- Step: Add some olive oil to a bowl, using a brush or your fingers, rub the oil all over the bowl, then add the dough.
- Step: Cover with a plastic wrap and let it rest for an hour until it rises and doubles in size.
- Step: Dust your surface with some flour. Remove the dough from the bowl. Cut into 8 equal-sized pieces.
- Step: Using your hands, gently stretch each piece of dough to a circle, and then using a rolling pin, roll it out to about a ¼ inch thick circle.
- Step: Using your hands, gently stretch each piece of dough to a circle about 7-8 inches wide.
- Step: Heat a cast iron pan over high heat. Add 1 teaspoon of olive oil. Add one stretched pita to the pan. Cook for about a minute. Drizzle a little oil on top and flip, cook on the other side for another minute.
- Step: Once all pitas are cooked, you can add some melted garlic and herb butter on top, optional.
Notes
Ensure the pan is very hot before cooking to help pitas puff up. For storage, keep in a sealed bag in the fridge for 3-4 days or freeze for up to 2 months.
- Prep Time: 10 minutes
- Cook Time: 8 minutes
- Category: Appetizer, Side Dish
- Method: Pan-frying
- Cuisine: Greek
Nutrition
- Serving Size: 1 pita
- Calories: 124 kcal
- Sugar: 1 g
- Sodium: 296 mg
- Fat: 4 g
- Saturated Fat: 1 g
- Unsaturated Fat: 3.5 g
- Trans Fat: 0 g
- Carbohydrates: 19 g
- Fiber: 1 g
- Protein: 3 g
- Cholesterol: 1 mg