
Create a healthy, chewy snack with these simple homemade fruit roll-ups. This recipe uses just three ingredients and is perfect for hiking or quick on-the-go eating.

List of ingredients
- 15 oz can sliced pears, no sugar added – provides a smooth base and mild sweetness.
- 15 oz can sliced peaches, no sugar added – adds a bright, characteristic fruit flavor.
- 3 Tbsp honey – improves the final chewy texture and adds natural sweetness.
step-by-step instructions
- Drain fruit: Drain the liquid from the cans of pears and peaches, but do not rinse the fruit.
- Blend: Combine the drained fruit and honey in a blender or food processor and blend until the mixture is completely smooth.
- Prepare trays: Line your dehydrator trays with parchment paper or silicone fruit leather mats, ensuring you do not use wax paper.
- Spread puree: Spread the blended fruit onto the trays in an even layer approximately 1/8 of an inch thick. Lightly tap the tray on the counter once to remove any trapped air bubbles.
- Dehydrate: Set your dehydrator to 135°F and process for 5 to 8 hours. Check the progress after 4 hours and rotate the trays to ensure even drying.
- Cool: Once the leather is bendable and tacky but not sticky to the touch, remove it and let it cool to room temperature.
- Roll and cut: If using silicone mats, move the leather to parchment paper first. Roll the leather into a log and use a sharp knife or kitchen shears to cut it into 2-inch wide pieces.
- Store: Place the finished rolls in an airtight container at room temperature.
Optimizing Fruit Selection
Benefits of Using Canned Pears
Canned pears are available throughout the year, ensuring you can make these snacks regardless of the season. They are typically canned at the peak of ripeness, which maximizes the natural sugar content and flavor profile.
Advantages of No-Sugar-Added Canned Fruit
Choosing cans with no added sugar allows you to control the sweetness level of the final product using honey. This prevents the fruit leather from becoming overly syrupy or sticky, which can interfere with the dehydration process.
Selecting the Right Honey
Raw local honey is preferred for its deeper flavor and natural properties. Any standard honey will work, but a thicker honey can provide a slightly denser, chewier texture to the finished roll-up.
Essential Equipment Details
Why a Dehydrator is Necessary
A dedicated food dehydrator is superior to an oven because it uses a fan to circulate air constantly. This airflow removes moisture more efficiently and prevents the fruit from baking or scorching, which would happen in a standard oven.
Blender vs Food Processor
A high-powered blender, such as a Vitamix, is ideal for achieving a completely smooth puree without lumps. A food processor can also be used, but you may need to process the fruit for a longer duration to ensure a consistent texture.
Silicone Mats vs Parchment Paper
Silicone fruit leather mats are reusable and provide a non-stick surface that makes removal very easy. Parchment paper is a convenient disposable alternative, but avoid wax paper as it can melt or fuse with the fruit puree.
Perfecting the Dehydration Process
Managing Puree Thickness
Aim for a consistent thickness of 1/8 of an inch across the entire tray. Because the fruit shrinks significantly as water evaporates, a layer that is too thin will result in brittle leather, while a layer too thick will take excessive time to dry.
Testing for Optimal Dryness
The fruit leather is done when it is bendable and slightly tacky but does not leave a residue on your fingers. If it feels wet or sticks to your skin, it requires more time in the dehydrator.
Implementing Tray Rotation
Most dehydrators have hot spots depending on where the heating element or fan is located. Rotating the trays every few hours ensures that the edges and center of the leather dry at the same rate.
Customizing Flavor and Texture
Adding Citrus for Brightness
Adding a teaspoon of lemon or lime juice to the blender can brighten the flavor of the peaches and pears. The acidity also helps preserve the vibrant color of the fruit during the drying process.
Substituting Different Fruit Combinations
You can replace the pears with apples or the peaches with apricots for a different taste. Ensure the substituted fruits have a similar water content to maintain the correct drying time.
Using Alternative Natural Sweeteners
If you prefer a different flavor, you can substitute honey with maple syrup or agave nectar. Keep the quantity at 3 tablespoons to ensure the texture remains chewy rather than sticky.
Storage and Shelf Life
Airtight Container Requirements
Store the roll-ups in a glass jar or a BPA-free plastic container with a tight seal. This prevents the fruit leather from absorbing moisture from the air, which would make them sticky again.
Optimal Room Temperature Storage
These snacks are designed to be stored at room temperature in a cool, dry place. Keeping them out of direct sunlight prevents the colors from fading and keeps the texture consistent.
Extending Freshness in the Fridge
While room temperature storage is standard, placing the airtight container in the refrigerator can extend the shelf life. This is particularly helpful in very humid environments where the leather may soften.
Troubleshooting Common Issues
Correcting Sticky Fruit Leather
If the leather remains sticky after the recommended time, it usually means the layer was spread too thick or the humidity is high. Return the trays to the dehydrator for another 1-2 hours until the surface is no longer tacky.
Preventing Brittle or Hard Rolls
Over-drying occurs when the fruit leather is left in the dehydrator for too long, removing too much moisture. To avoid this, start checking the texture frequently after the 5-hour mark.
Eliminating Surface Air Bubbles
Air bubbles can create uneven thickness and weak spots in the fruit leather. Tapping the tray firmly on a hard surface immediately after spreading the puree forces the bubbles to the surface where they can pop.
Frequently Asked Questions
Can I use fresh fruit instead of canned?
Yes, but fresh fruit requires peeling and often pretreatment, such as blanching or soaking in citric acid, to prevent browning. Canned fruit is more convenient and provides a more consistent sugar level for drying.
How long do these fruit roll-ups last?
They are best consumed within 7 days for maximum flavor and texture. However, they can be stored in an airtight container for up to two weeks at room temperature.
Why is my fruit leather uneven?
Unevenness is usually caused by an inconsistent spread of the puree or a lack of tray rotation. Use a spatula to level the puree and rotate the trays every 4 hours to ensure uniform airflow.
Can I make these without a dehydrator?
While possible in an oven at the lowest setting, the results are often inconsistent and the fruit may cook rather than dry. A dehydrator is highly recommended for the proper chewy fruit leather texture.
Do I need to rinse the canned fruit?
No, do not rinse the fruit. The small amount of juice remaining on the fruit contains concentrates that contribute to the sweetness and the final chewy consistency of the roll-ups.
Print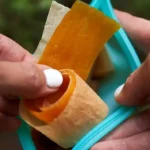
Peachy Pear Fruit Roll-Ups
- Total Time: 8 hours 5 minutes
- Yield: 10 fruit roll ups 1x
- Diet: Vegetarian
Description
This homemade fruit roll-up recipe only requires 3 ingredients, and it couldn’t be any easier to make. This fruit leather is sweet, chewy, and the perfect quick snack to take on a hike, or have on hand for busy days at home.
Ingredients
- 15 oz can of sliced pears, no sugar added
- 15 oz can of sliced peaches, no sugar added
- 3 Tbsp honey
Instructions
- Step: Drain the liquid from the cans of fruit. Do not rinse.
- Step: Add the fruit and honey to a blender and blend until smooth.
- Step: Line your dehydrator trays with parchment paper or a silicon fruit leather mat. Do not use wax paper.
- Step: Spread the blended fruit onto the trays in an even layer. Remember, the fruit thickness will shrink once it’s dehydrated. I like to spread a layer that’s about ⅛ of an inch thick. Lightly tap the tray on the counter once to get some of the air bubbles out.
- Step: Dehydrate at 135°F for 5-8 hours. The exact time will vary depending on your dehydrator and how thick you spread the fruit. Check it after about 4 hours and rotate the trays as needed to make sure everything is dehydrating evenly.
- Step: When the fruit leather is done, it should still be slightly tacky, but not really sticky. When you touch it, nothing should stick to your hands. It should also be bendable. Once done, let the fruit leather come to room temperature before rolling and storing.
- Step: If using silicone mats, remove the mats and place the fruit leather on a piece of parchment paper before cutting. With the parchment paper on the bottom, roll the fruit leather into a log. Using a sharp knife or clean kitchen shears, cut the fruit log into roughly 2-inch wide pieces.
- Step: Store in an airtight container at room temperature. These should keep well for a couple of weeks, but I think they’re best if consumed within 7 days.
Notes
I prefer to use canned fruit with no sugar added. If you can’t find that, you can use normal canned fruit with syrup, just drain the syrup really well before blending.
- Prep Time: 5 minutes
- Cook Time: 8 hours
- Category: Snack
- Method: Dehydrating
- Cuisine: American
Nutrition
- Serving Size: 1 fruit roll up
- Calories: 57 kcal
- Sugar: 11 g
- Sodium: 20 mg
- Fat: 0 g
- Saturated Fat: 0 g
- Unsaturated Fat: 0 g
- Trans Fat: 0 g
- Carbohydrates: 14 g
- Fiber: 2 g
- Protein: 1 g
- Cholesterol: 0 mg